Sunday 17 February 2013

Recent Posts With Scrollbar Widget For Blogger


Finally, we are back with another widget with a generator. I was trying to find this widget for my blog since I started blogging, i never got success in searching this widget. Last night, I created this widget using recent-posts-with-titles-only.js script.

This awesome script is created by blogsolute.com, and modified by madtomatoe.com. With this widget you can show upto recent 25 posts of your blog in a small box. Width of this widget is 100%, which means it automatically adjusts on your blog's sidebar. If you're sharing this post then don't forget to give me a backlink.

Below is our Widget Generator with several fields:

Friday 15 February 2013

Reasons To Buy A Custom Domain For Your Blog

When you start blogging with Blogger or any other other free blogging platform, you get a free subdomain to kick off your blog. Soon all your visitors get familiar with your free subdomain. But when you finally decide to purchase a custom domain you get confused with several questions in mind. You start thinking whether or not you'll lose your spot in Google, reputation, rankings, and more.

You can buy a custom domain as low as $7-$8 from GoDaddy and BigRock for a full year, which is less than your internet and phone bill. Following reasons will tell you why should you buy a custom domain as soon as possible:

Reputation Among Other Bloggers:

Blogs with a custom domain, e.g. .com, .net, .org, are more respected among other bloggers than blogs with sub domains such as .blogspot.com. Nobody takes .blogspot stuff seriously, just like Twitter accounts with default profile picture.

I'd prefer to visit www.bwidgets.com rather than www.widcraft.blogspot.com. It shows that you are taking your work serious by spending some money on the service that you use and you are not just another monkey with a computer (some of them are awesome).

Easy To Remember And Share:

Blogs with a custom domain are always easy to remember. This is the reason why blogs with subdomain don't get much attention on social media, which is important in blogging. A blog with custom domain gets a good amount of traffic from social media.

Blogs with a custom domain are likely to get more shares on social media then blogs with subdomain. Let's face it, we all prefer to put gmail.com on our address bar rather than mail.google.com.

More Earning With Custom Domain:

Some big advertising sites like BuySellAds do not accept subdomains. Also, direct advertisers prefers to advertise their content on a blog with a custom domain. Believe me, you will get more for the same content with a custom domain. Also, never use GoDaddy affiliates with a free domain :p

You Can Use More Services:

That's right, you can use more services with your custom domain, e.g. Google Apps, bitly Custom Short Links, Custom Emails, and more. That's right, your domain provider will provide you one or two free emails, e.g. admin@yoursite.com. It's great to use your own email for your site. Also, you can create a short link service with your custom domain, like go.bwidgets.com.

Unlimited Subdomains:

You can create unlimited subdomains with your custom domain, such as mail.bwidgets.com. You can host your other blogs with your own custom subdomain, which is way better than using .blogspot.com domain. You can also use your subdomain in another services, such as Google Sites, Newsletters, and more.

Boost Up Your Rankings:

As more and more people notice your blog and bookmark and share it, your ranking on SERPs which is search engine results page will increase. Also, after changing your domain, you'll loose your PageRank only at temporary basis. Once Google robots locate all your redirected links, your rankings will be granted back to you on next PageRank update.

Still here? Just visit GoDaddy or BigRock to buy a custom domain for your blog. Don't forget to leave a comment...

Thursday 14 February 2013

Improve Your Google PageRank


Earlier this week, I posted about Google PageRank at this link. Now, I'll tell you several ways to improve your site's Google PageRank. Your website's PageRank depends upon quality backlinks you get for your website and total count of your website pages.

1.Write Quality Content:

Everybody likes to share some good content. Create content that users want and will share with others, which will get you bunch of backlinks from other sites. Don't forget to give me a backlink from this point.

2.Guest Blogging Is A Great Move:

Seriously, guest blogging is a great way to backlink you site from an another blog or site. Also, don't forget to submit your articles to various web directories and forums. Good content never goes waste. You can also submit a guest post for our blog at this link.

3.Publicize Your Site Everywhere:

Add your site’s URL, e.g. www.bwidgets.com, into your content. Never miss a change to show off, e.g., newsletter, business cards, email signatures, press releases and more.

4.Get Backlinks From High-Quality Websites:

Ask "high-quality" websites to give a backlink on their blog. It'll improve your PageRank for sure. If your site links to delisted websites, your website might also be removed from Google’s index. Always check site's reputation before asking for a backlink.

5.Check Site's Reputation Before You Link Back:

If you receive a request for a link, check the site's reputation before giving them a backlink on your site. Also, always use 'rel=nofollow' attribute to link back to delisted or low-quality website.

6.Provide RSS Feed:

RSS (Really Simple Syndication) makes it easy for other sites to distribute your headlines and content, your RSS feed will be indexed by popular Blog search engines, including BlogSearch, and Ask.com Bloglines.

7.Keep It Up:

If your site is dead for an extended period, Google may reduce the ranking of your site. Allow your visitors to submit guest posts for new articles.

8.Make Use Of rel=nofollow:

rel=nofollow attribution tell search engines "Don't follow links on this page" or "Don't follow this specific link." This means that Google does not transfer PageRank or anchor text across these links.

Here are some cases in which you might want to consider using nofollow:
  • Untrusted content: Most importantly, always use nofollow for example, untrusted user comments or guestbook entries — you should nofollow those links. Which will keep spammers away from your site.

  • Paid links: In order to prevent paid links from influencing search results and negatively impacting users, make use of nofollow.

  • Crawl prioritization: Search engine robots can't sign in or register as a member on your forum, so there's no reason to invite Googlebot to follow "register here" or "sign in" links.

9.Give Away:

Enable others to copy, distribute, and make use of your articles and content, as long as they give your site credit. Also, write newsletter to remind your visitors about your site. Create an embed-able widget of your site for your users.

10.Never Try To Cheat Google:

If Google suspects that you are trying to deceive it web crawler and thus its users by including hidden text, misleading or repeated words, pages that don’t match your sites description, deceptive redirects, duplicate site or pages, or other disingenuous tactics, then Google may delist your site from its index.

Wednesday 13 February 2013

Using Custom Short Domain With bitly


bitly (bit.ly or bitly.com) is a URL shortening and bookmarking service owned by Bitly, Inc., a Betaworks company. The current CEO is Peter Stern. It offers URL redirection service with real-time link tracking.

It's always a great move to use your own url shortner, bitly allows you to use your own custom domain to create short links for free. Google Short Links is also a great way to build your own custom url shortner but the fact is that Google Short Links is no more a free product. Still, you can check our Google Short Links at go.bwidgets.com.

A custom short domain is a great way to brand your content across the web! For example, the New York Times uses "nyti.ms" as a custom short domain, and TechCrunch uses "tcrn.ch".

If you were to use "example.me" as a custom domain, instead of appearing like this: bitly.com/example

your links would appear like this: example.me/example

Purchase A Domain:

BigRock is a great place to begin your search for exotic short domains. Your short domain name needs to be 15 characters or less (including the dot). You can also use your existing domain or a sub-domain. Wikipedia maintains a list of top-level domains (TLDs).

Using Custom Domain:

For using your top-level domain (example: bwidgets.com), you need to update your "A-Records" and "CNAME Records." Your domain name must be 15 characters or less (including the dot):

  • Log into your domain registrar's website.
  • Select the short domain you want to modify.
  • Find the section for managing DNS entries. The name of this section varies, but is usually something like "DNS Configuration," "DNS Records", "Advanced DNS," "Total DNS", "Host records," or similar.


Add or edit the existing A-Record for your site. You can click on images for a larger look. Also, don't copy any other IP or anything from images. There all are just for example, I'am not really editing any records DNS records.


Edit the existing A-Record for your site and change the IP address to 69.58.188.49 If there is no existing A record (which is uncommon), add a new one. The A record's "host name" should be either the character @ or your base domain (both mean the same thing). You should only have one A Record. If you have more than one, remove all others and leave only the one pointing to bitly's IP.


After editing A-Records, it's time to add a CNAME Record in your DNS.


In your DNS, enter "www" as your host name name, and that it points to value 'cname.bitly.com'. For example, if your short domain was 'fred.me' you'd point your CNAME record for 'www.fred.me' to 'cname.bitly.com.'

All done in your DNS Manager. Now, scroll down to the "adding your domain to bitly" point for next step.

Using Custom Sub-Domain:

For using your sub-domain (example: sl.bwidgets.com), you need to update your "CNAME Records." Your domain name must be 15 characters or less (including the dot):

  • Log into your domain registrar's website.
  • Select the short domain you want to modify.
  • Find the section for managing DNS entries. The name of this section varies, but is usually something like "DNS Configuration," "DNS Records", "Advanced DNS," "Total DNS", "Host records," or similar.


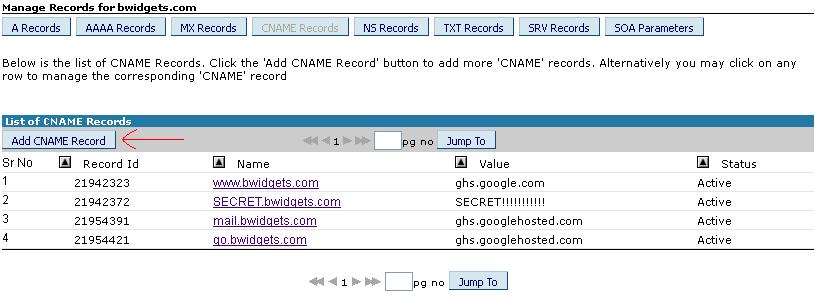
In your CNAME Reconds, click on "Add CNAME Record." Every domain registrar has their on unique look.


In Host Name, put your desire sub-domain name (example: sl.bwidgets.com). In Value, put cname.bitly.com. All done in your CNAME Records. Now, it's time to add your domain to bigly.

Add Your Domain To bitly:

After setting up your custom domain, it's time to add your domain to bitly. It can take up to 48 hours for domain changes to propagate. It's easy:


Sign in to your bitly account, go to "settings" from the upper right pull-down menu, (or click here) and click on "Advanced" tab.


Enter your short domain under under "Custom Short Domain." (Located under the "Advanced" tab.)


Now, in this screen, you'll see instruction that we mentioned earlier on this tutorial. However, don’t take this step until you have updated your DNS Records. If you've already completed DNS setup, which we mentioned above then click on "Verify" button.


After clicking on "Verify," you'll see above screen. That's IT!!!

If bitly is showing some sort of error then try to double check all steps. Also, DNS changes can take up to 48 hours for domain changes to propagate. In my case, it took about two hours to update DNS. Now, your sub-domain or domain's root directory will redirect you to bitly's homepage. Don't forget to leave a comment....

Sunday 10 February 2013

What Is Google PageRank And Why Should I Use It?


What Is Google PageRank?

Google PageRank is a link analysis algorithm, named after Larry Page and used by Google Search. Your website's PageRank depends upon quality backlinks you get for your website and total count of your website pages.

The Google Toolbar's PageRank feature displays a visited page's PageRank as a whole number between 0 and 10. The most popular websites have a PageRank of 10. The least have a PageRank of 0.

Courtesy of Wikipedia, here is an example image of how Google PageRank works:


Mathematical PageRanks for a simple network, expressed as percentages. (Google uses a logarithmic scale.) Page C has a higher PageRank than Page E, even though there are fewer links to C; the one link to C comes from an important page and hence is of high value. If web surfers who start on a random page have an 85% likelihood of choosing a random link from the page they are currently visiting, and a 15% likelihood of jumping to a page chosen at random from the entire web, they will reach Page E 8.1% of the time. (The 15% likelihood of jumping to an arbitrary page corresponds to a damping factor of 85%.) Without damping, all web surfers would eventually end up on Pages A, B, or C, and all other pages would have PageRank zero. In the presence of damping, Page A effectively links to all pages in the web, even though it has no outgoing links of its own.


Why Should I Use It?

Google PageRank is a great way to know about, which type of sites give you a backlink. The higher a page is ranked, the better it will perform in organic search results.

If you want to generate income from search engine marketing such as paid links, pay per click or banner ads, how much you will get will largely depend on your page rank. The higher your page rank is, the higher your advertisers will pay you.

PageRank is updated every 3-6 months at Google's discretion, and therefore should not be used as a definitive way to judge the trust of a website; it only gives us an idea of the website's authority and link power based on Google's algorithm.

How To Check PageRank?

There are lots of sites, where you can check your site's PageRank. We recommend you to use PRChecker.net. In this article, we effected Wikipedia and PRChecker's PageRank, by giving them a backlink.

You can also embed your site's PageRank on your site by using following code:


<a href="http://www.prchecker.net" title="PageRank Checker"><img src="http://www.prchecker.net/lookup.php?site=http://www.bwidgets.com&badge=img1"/></a>

In above code, replace www.bwidgets.com with your site's url. Don't forget to leave a comment.

Saturday 9 February 2013

Beautify Your CSS Code


Messy CSS codes just cause problems in coding. It's always hard to edit messy CSS files on your notepad. Well formatted CSS codes are really easy to read and edit. While creating templates, we write hundreds of CSS codes, and it's really hard for us to format all lines.

Also, when we write CSS codes for others, we really don't focus on code formatting, which cause some problems in future when we have to re-edit those stylesheets.

If you're thinking about to manually formatting you old codes, then it's just a waste of time when we can use an automatic CSS formatting tool.

CSS Beautify automatically formats your style to be consistent and easy to read. It's an open-source project from Sencha Labs. If you want then you can also download this tool at this link.

By using CSS Beautify, you'll be able to format you CSS codes in no time. It's way too much easy, even for Justin Bieber fans(no comments on this point).

Just put your messy CSS codes in first field, and you'll get beautifully formatted CSS code instantly:


Hope this will help you in future....Also, i want to share this good news with you all.

Thursday 7 February 2013

Customized Labels Cloud Widget For Blogger


Here is a great Labels Cloud styling/widget invented my MBT. It looks a bit old-school but it's looks so beautiful in plain or white style templates. MBT widgets never gets old for sure. It for Labels Cloud widget so don't forget to choose Labels Cloud option in Layout section. Don't worry, i'll explain everything:

  • Go To Blogger > Layout > Click add a gadget and choose Labels
  • Inside the settings make sure to choose the cloud display.
  • Now save the widget and go to settings > Template
  • Click Edit HTML > Search for ]]></b:skin>
  • Just above it paste the following CSS code:

/*-----Custom Labels Cloud widget by www.BWidgets.com----*/
.label-size{
margin:0 2px 6px 0;
padding: 3px;
text-transform: uppercase;
border: solid 1px #C6C6C6;
border-radius: 3px;
float:left;
text-decoration:none;
font-size:10px;
color:#666;
}

.label-size:hover {
border:1px solid #6BB5FF;
text-decoration: none;
-moz-transition: all 0.5s ease-out;
-o-transition: all 0.5s ease-out;
-webkit-transition: all 0.5s ease-out;
-ms-transition: all 0.5s ease-out;
transition: all 0.5s ease-out;
-moz-transform: rotate(7deg);
-o-transform: rotate(7deg);
-webkit-transform: rotate(7deg);
-ms-transform: rotate(7deg);
transform: rotate(7deg);
filter: progid:DXImageTransform.Microsoft.Matrix(
                    M11=0.9961946980917455, M12=-0.08715574274765817, M21=0.08715574274765817, M22=0.9961946980917455, sizingMethod='auto expand');
zoom: 1;
}

.label-size a  {
text-transform: uppercase;
float:left;
text-decoration: none;
}
.label-size a:hover  {
text-decoration: none;
}

Save your template....All Done......Don't forget to leave a comment for any help.....

Tuesday 5 February 2013

Adding AJAX Page Loading Effect To Blogger


AJAX is not a new programming language, but a new way to use existing standards. AJAX is the art of exchanging data with a server, and updating parts of a web page - without reloading the whole page. AJAX was made popular in 2005 by Google, with Google Suggest.

Google Suggest is using AJAX to create a very dynamic web interface: When you start typing in Google's search box, a JavaScript sends the letters off to a server and the server returns a list of suggestions. Examples of applications using AJAX: Google Maps, Gmail, Youtube, and Facebook tabs

You can also use AJAX to create some beautiful loading effects on your blogger blog. Here we go:

  • Go To Blogger > Template > Edit HTML > Click on "Proceed"
  • Find and place following code below <body>:

<div id='loading'><div id='progress-bar'></div><div id='loader'>Loading...</div></div>

  • Now add following code just above </head>:

<script charset='utf-8' src='http://widcraft.googlecode.com/svn/jquery.min.js' type='text/javascript'></script>
<script>

(function($){

$("html").removeClass("v2");


$("#header").ready(function(){ $("#progress-bar").stop().animate({ width: "25%" },1500) });
$("#footer").ready(function(){ $("#progress-bar").stop().animate({ width: "75%" },1500) });


$(window).load(function(){

    $("#progress-bar").stop().animate({ width: "100%" },600,function(){
        $("#loading").fadeOut("fast",function(){ $(this).remove(); });
    });

});
})(jQuery);
</script>

<style>
#loading {
    position: fixed;
    z-index: 50;
    top: 0; left: 0;
    width: 100%; height: 100%;
 background: #3c5a76 url(https://blogger.googleusercontent.com/img/b/R29vZ2xl/AVvXsEh1-DMF_2ELaLMFFOFWGw5wA7hTFnRimVjuZ1NftTS5Ik3tem5nDd-GMA7v1sFxfpSMyptt6qhbEoWPtIM90BTsXn4gKHFxNxVj6nKy9WpFoK9H9on6L_Xa3y7tnuyAxoe4X7ZsiJr0Pvw/s1600/Loading.gif) no-repeat center;
    line-height: 350px;
    text-align: center;
    font-size: 36px;
    color: #353231;
    text-indent: -9999px;
}
.v2 #loading { display: none; }

#progress-bar {
    position: absolute;
    top: 0; left: 0;
    background: rgb(236, 133, 0);
    opacity: 0.8;
    width: 0;
    height: 18px;
}
#loader {
 background: url(https://blogger.googleusercontent.com/img/b/R29vZ2xl/AVvXsEijoHdj8b4N4HYsdgZ5Xf8t7Cj51p8kBgOcplIV8Xse3bt2InhJi5Sidjhw-upO4DAfIce7QHeFAq-lWDBRfrBMxvpZYtj3crPvFXKQuU4hK5_gelnF1SAqe0667mph2Irnif15ensDcJE/s1600/BWidgets.png) no-repeat center 25%;
 height: 100%;
 display: block;
}
</style>

Save your template and see the magic....Don't forget to leave a comment....

Saturday 2 February 2013

Remove Attribution Widget From Blogger Mobile Template


In our last post, we discussed how to remove attribution widget from blogger. In this post, we'll discuss how to remove attribution widget from blogger mobile template.

In previous post, we showed you how to remove attribution widget from your blog but that widget can still be viewed by visiting your mobile template (If you're using). After searching on Google for hours i found nothing about this topic, so i invented my own way to do this.

In last trick, we removed this widget, now we'll hide'em. Without wasting any time, let's get started:

  • Go To Blogger > Template > Edit HTML > Proceed
  • Find and remove following code from your template:

<b:widget id='Attribution1' locked='true' title='' type='Attribution'/>

  • Find </body> in your template and just above it paste following code:

<div style='display:none;'>
<b:section class='hiddenbar' id='hiddenbar' preferred='no'>
<b:widget id='Attribution1' locked='true' mobile='no' title='' type='Attribution'/>
</b:section>
</div>

  • Save your template, it's done.

Let me explain this, instead of removing attribution widget, we hid this widget with css. If you only add mobile='no' property in your attribution, instead of this code, it'll only remove this widget from your mobile template. If you're copying this tutorial, then don't forget to give us a backlink on your post. Also, don't forget to leave a comment.

Remove Attribution Widget From Blogger


Today I'll show you how to remove attribution (Powered by Blogger) widget from your blog. It's always hard for newbies to remove this widget but don't worry about that.

In this tutorial, you'll learn about removing locked widget from your blog, just like Attribution widget. Not much to explain, let's get started:

  • Go To Blogger > Template > Edit HTML > Proceed:
  • Find following code in your  template:

<b:widget id='Attribution1' locked='true' title='' type='Attribution'/>

  •  Now, just replace locked='true' in above code with locked='false'. Save your template.

Now your attribution widget in unlocked. If you want remove, then you can remove it from your layout section. In next post, i'll show you how to removing attribution widget from your mobile template.

Popular Posts

 
Powered by Blogger.